Monthly Archives: September 2013

Dairy-Free “Choco-cado” Pudding

Standard

So, true story, I made this for a friend one time. She loved it. She ate quite a bit of it. She was very surprised that she liked it, because avocados had always grossed her out.

We quickly discovered that her body had been trying to tell her something all along:

She was allergic to avocados.

So in a way, I sort of poisoned my friend. Not cute.

Thankfully, she recovered just fine, but needless to say, avocados do not make an appearance in my kitchen when she is around.

Now that I have frightened you with that little tale, let me tell you how to make poisonous choco-cado pudding!

Ingredients:

2 med sized avocados, pitted and peeled. (I used mexicola from my CSA box)

1/4 cup organic REAL maple syrup OR  6-10 medjool dates

1.5 TBSP unsweetened cocoa powder (I like Trader Joe’s)

1/4 cup vanilla hemp milk

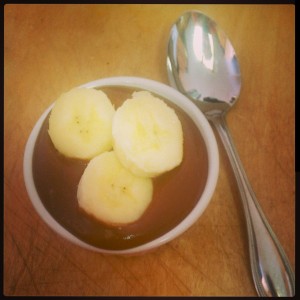
Put all ingredients into the food processor. Process until creamy and smooth. If it is too thick, add more hemp milk about a tsp at a time. If its too thin, you need more avocado. 🙂  Fold in sliced bananas if desired.

chococado


Today was the perfect day to make this because I had 2 mexicola avocados on my counter that were *just* about to die on me. I saw this the other day and thought it was quite possibly the most perfect little bit of kitchen truth:

avocadosnotyet


Right? I know.

Also, little sidenote; My favorite variation of this recipe:

Substitute the hemp milk for raw cream. Blend all of the ingredients (minus the cream) together first, then add the cream in. Puree for 5-10 seconds until it begins to “whip”, making for a really nice mousse consistency. 🙂

This is delicious with fresh strawberries too!

Definitely file this one under the “treat” category as the sugar content is pretty high in this one, but still a nice alternative to the packaged garbage. 🙂

Enjoy… Unless you’re allergic to avocados. 😉

Taco Salad Lettuce Wraps

Standard

Lettuce has arrived! I am so excited about greens being in season.  You have no idea.

I love a tomatoes and peppers, but darn it, I am so ready for something new!

I made a quick and tasty meal over the weekend that I thought I would share with you. It was inspired by the gorgeous lettuce in my CSA box and was super tasty.

Taco Salad Lettuce Wraps!

Ingredients:

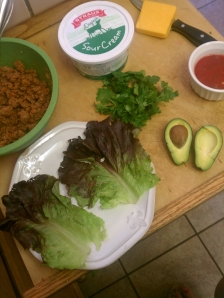
Seasoned, cooked, ground beef which was leftover from the night before. Nice and cold. (1.5 lb Organic Ground beef, 2-3 tsp cumin, 2 TBSP chili powder, 1 chopped jalapeno, salt, pepper, garlic)

A bit of shredded cheese (cheddar in my case.)

Fresh salsa, also made from csa ingredients.

Chopped cilantro

A couple large leaves of lettuce (red leaf here.)

1 mexicola avocado, sliced.

And “dressing” made from 2 TBSP organic sour cream and 1-2 TBSP of your fresh salsa, whisked together.

lettucewraping


Pink toenails optional.


Pretty simple steps:

Layer like you would a taco. Meat, cheese, cilantro, salsa, avocado, dressing. Or however you like it. 😉

I served mine with a handful of “Late July” chips because I’m a texture girl and I really need crunch with my food.

lettucewraps


Although the lettuce held up pretty well as a wrap, I did eventually end up crushing the chips over the top and eating it like a salad. This is mostly because I’m funny about food and have strange eating habits.

These would be good taken as lunch to work, you know, if I worked outside the home. I would probably keep the lettuce and other ingredients separate until it was time to eat, though. 🙂

I’m hoping to get a few more greens-inspired recipes up this week.

Anyone else enjoying fall produce?


Bacon, Potato & Arugula Frittata

Standard

Typically when I make a frittata, I stick to my standard combination. Potato, spinach and cheese.

However, when I saw that my fave farm had arugula at last week’s farmer’s market, I had an idea.

Initially, I just figured I would sub the spinach for arugula, but figured I had better consult my friend Brigitte over at 365 Days of Radical Self Transformation and ask what she thought. She’s an amazing chef, and I knew she’d have the right advice for me.

She told me to add bacon.

Now that’s a real friend.

She also suggested tomato, which sounds amazing, but I knew no one in my family would eat it. If you don’t have the “Eww That’s Gross” crew at your house, add the tomato. B knows what she’s talking about.

One pan, little prep, 20 minutes, tons of flavor. Can’t beat that!

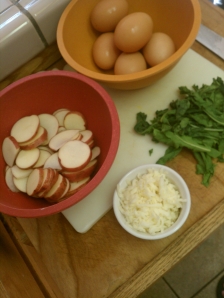
Start with your ingredients:

frittata1

4-6 small red potatoes, sliced very thin. I used Irish Reds from my CSA box. They sort of define what a potato should taste like for me. Mine were the size of a golf ball, roughly. If yours are larger, use 3-4 potatoes.

6 organic eggs, beaten with 1/3 cup whole milk or half and half

1/2 cup cheese of your choice. I used mozz because its what I had. Something sharp would have been nicer.

2 strips of [preferably nitrate free, uncured] bacon, chopped

About 1/2 cups arugula, chopped coarsely

2-3 tbsp refined coconut oil

Salt, pepper, and garlic powder to taste

In a skillet (or fancy frittata pan if you have one), *almost* cook the bacon. Once the bacon is almost completely cooked, add the oil and  the potatoes. Sautee for a minute or two, then top with a lid and leave for about ten minutes, stirring occasionally, until tender. If you overcook the bacon before adding potatoes, it will burn at this point. Cook until just about done…it will crisp up with the potatoes.

frittata2


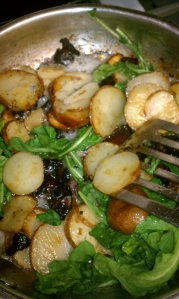
Once potatoes are tender, add your arugula. Toss until wilted:

frittata3


Now, add your egg and milk (or half and half) mixture and sprinkle with cheese:

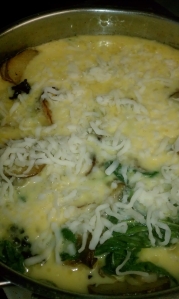
frittata4


Top with a lid, and cook for 8-10 minutes over loooow heat until the egg sets up.

Serve warm with toast, fresh fruit, coffee, or whatever you like!

frittata5


I love this meal because while it’s typically a breakfast food, it makes and AMAZING dinner too. Being that I am restricting potatoes as much as my will power lets me right now, this tasted like a real treat to me. Potatoes AND bacon? In the same dish? Yeah, that was workin’ for me.

Add in the spicy arugula and creamy cheese and I was in heaven. So, so delicious.

I noticed that my CSA is starting to offer more greens  this week (helloooo fallll!!) and I’m going to have to experiment with those as well.

The “Eww That’s Gross” crew will just have to deal. 😉


Huevos Rancheros Con Aguacate

Standard

I love eggs. Usually. Right now, I am pretty tired of eggs, but in an effort to boost my protein intake, I am trying to find new ways to eat them.

On Sunday, I made two attempts at egg preparation, using my CSA box as inspiration.

One peek into my fruit bowl was all it took to spark an idea for breakfast dish #1.

I spy….avocados. Yessss!

avocado

The cutest, tiniest avocados ever, by the way. They are called “Mexicali” Avocados, and they are divine. Bonus? The skin is edible should you choose to eat it. No peeling!

Once I spotted the avocado, I had another thought. Last week, I made (and canned) some salsa. Super simple salsa too. Tomatoes, onions, peppers, squeeze of lemon and pinch of salt. The end.

Very similar to the recipe here, but without the cilantro, and it was cooked (because I was canning it.)

Then I thought, “It’s Sunday…I can eat a corn tortilla!” (Sunday’s are my “day off” from dietary restrictions.)

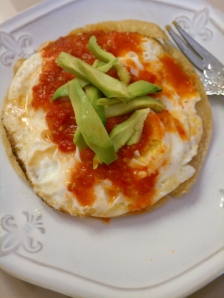
I knew what I had to do. Huevos Rancheros Con Aguacate (Rancher’s Eggs with Avocado.) Or, Fried eggs on a tortilla with red sauce and avocado on top.

It was SO easy guys. Even if you don’t have salsa just lying around, it is SO easy to make.( <—- click there!)

P.S. get your tomatoes now and fill up the freezer or pantry with salsa for later. You won’t be sorry!

I started off by cracking two eggs into a little egg pan over med heat, coated in butter. Once the whites started to solidify a bit, I sprinkled a small lid with water, and topped the pan with it, turning heat to low. This essentially steams the top of the eggs so you don’t have to flip them. If you prefer to flip, go for it, but I find that breaking a yolk while flipping makes me want to break someone’s face, so I do what I have to do to avoid that.

While the eggs are cooking, Fry up a corn tortilla in a little refined coconut oil. You don’t want it crispy, just a little toasty yet still pliable. Drain the oil, then set on your plate.

Once the whites are done, but  yolks are still a bit runny, slide the eggs onto the tortilla.

Take some of your salsa, and heat it up a bit in the egg pan (save the dishes!)

Top the eggs with warm salsa.

Last? Top with slices of fresh avocado and a sprinkling of sea salt.

This would have been so yummy with sauteed nopales on the side!

YUM.

huevos rancheros

If I *really* wanted to cheat, this would have been heavenly with refried beans. In fact, it begged for them. If I’d had any in the pantry or cooked up, they would have been on that plate. So good.

Step outside the box guys. Keep your meals interesting and delicious. “Eating healthy” doesn’t have to mean “lacking flavor”. Gone are the day of stale rice cakes and crappy peanut butter.

Eat good quality, fresh, healthy foods that make your body and taste buds happy.

You really can have your cake and eat it too. 😉


It’s That Time of Year Again!

Standard

pumpkin-spice-all-the-things

While I’m not a HUGE “pumpkin spice all the things” person, I do enjoy a pumpkin spice latte once in a while. It tastes and smells like the holidays, which is about as much as I enjoy the holidays, to be honest.

Ugh. Holidays.

While I enjoy the latte, I don’t enjoy the price tag, OR the fact that I live 60 minutes from the nearest coffee shop.  Sooo,  when I rec’d two pumpkins in my CSA box this week, I had a moment of inspiration.

“I shall make my own!”, I declared.

Ok, I didn’t really *declare* it…it was more like, “Hmm…I wonder if I can make a pumpkin spice latte without any formal barista training, dairy, refined sugar, and without an espresso machine?”

And make one I did.

I had to start with the pumpkin. I needed puree. I don’t have a steamer or any fancy equipment in my kitchen, so I had to get creative. Before I forget, however, please note that pumpkin is good for more than just lattes and jack-o-lanterns. The effort you are about to put out for this recipe is so worth it! Your body will thank you. 😉

PumpkinMeme


Ok, enough about how healthy it is…back to how delicious it can be.

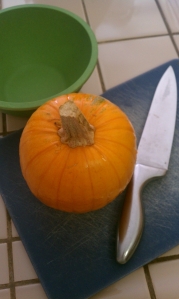
Step 1: Gather pumpkin, bowl for seeds, cutting board, and sharp knife:

pumpkin1

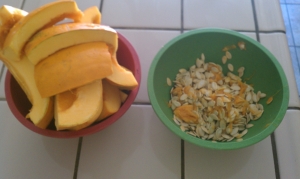
Slice pumpkin into wedges and remove seeds, setting aside for later. If you’re smart, you’ll make roasted pumpkin seeds. If you’re me, you’ll put them in a bowl of water to attempt “pumpkin strand” removal, only to forget about them and end up with a bowl of useless bloated pumpkin seeds. (If you have chickens, the seeds are an excellent de-wormer!)

pumpkin2

Next, I put my .50 cent thrift store pasta colander into my soup pot, dropped some water in the bottom, dropped the pumpkin inside, topped with lid and steamed until fork tender. You could use a steamer basket or veggie steamer if you are not lucky enough to own mismatched pieces that just happen to work together in a pinch.

pumpkin3

Once fork tender, I pulled the skin off, and pureed the pumpkin in my food processor. I also didn’t take a [crappy cellphone] picture of that.

Once I had my puree, I brewed some pretty strong coffee. I used one heaping TBSP of coffee per cup.

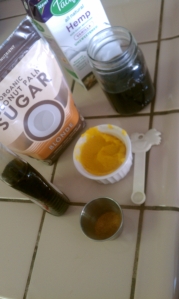
While the coffee brewed, I gathered my ingredients to make 2 latte’s:

3-4 TBSP of coconut sugar, depending on taste

6 TBSP of pumpkin puree

2 TBSP of grassfed butter (not pictured, and also not categorized as “dairy” in my world.)

2 tsp of raw honey (also not pictured)

1/4 tsp vanilla (which I make myself, hence the tacky maple syrup bottle sporting half of a label.)

1/4 tsp pumpkin pie spice (or in my case, some cinnamon, allspice, nutmeg, ginger and clove thrown together in random measurements. It was mostly cinnamon, fwiw.)

8 oz hot, strong coffee

1.5 cups hemp milk

pumpkin 4

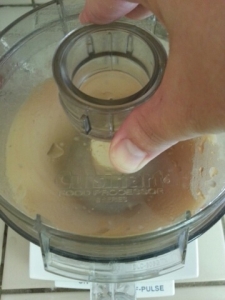
Toss all ingredients into the blender.

Blend for 30 seconds or so until it starts to foam up.

It was at this point that I realized it was going to be a lukewarm latte, due to all that cold hemp milk, so I transferred the blender contents to small pot and heated over med-low heat until warm, whisking frequently.

pumpkin5

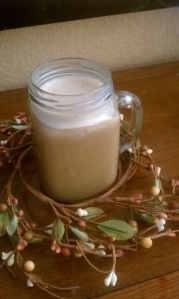
I then served it, nice and hot in my fave mug:

pumpkin6

From two small pumpkins, I was able to freeze enough puree for about 12 more latte’s. I froze them in 6 TBSP measurements in little baggies for later.

Like, say, when the holidays come and I need a little caffeine to get me through the drama fun-filled nights.

Happy (almost)  fall!

Move Over Applesauce!

Standard

At least for now. I love apples. Love applesauce. LOVE apple season in general…but where I live, it’s not that time yet.

It’s pear season.

And while they are not the same, I am treating them as equals.

In my kitchen, that is.

Yesterday I made “pearsauce”. Yes, All one word. Like “applesauce”, because, you see, I’m fair and promote equality.

It was so easy, and a huge relief to me because I had amassed 15 pears from the last 3 or 4 CSA boxes and some of them were starting to get a little too soft. I really, really didn’t want to let any of these organic beauties go to waste!

It was perfect timing too, because I already had the boiling water canner going, so it was no big to drop a jar in to seal it up for later. I could have just popped it in the fridge, but I didn’t want it to go to waste there either, and canning it allows me to save it for the perfect time. 🙂

Super, SUPER easy guys.

I started with 15 pears. I peeled, cored, and chopped them into large hunks. I put the hunked pears into a large sauce pot (which really wasn’t necessary…a medium sized one would have given me plenty of room) and added 1/4 cup of water, several shakes  of cinnamon, a splash of homemade vanilla,  and a pinch of salt. I cooked them over medium heat until they were all tender. Some were more tender than others, but it really didn’t take long to cook them all down. *Maybe* ten minutes, tops.

cooking pearsauce

Too bad I didn’t have a little more room in that pot.

Once tender, I added the whole (huge, gigantic) pot of pears to the food processor.

pureepearsauce1

Then, I puree. (As if you didn’t see that coming.)

pureepearsauce2

Once smooth, you can either eat warm, chill and eat (within a few days) or fill up jars and water bath can for 20 minutes. I chose the latter.

15 pears made ONE pint jar.

pearsauce done

ONE.

That means if you eat 1 cup of “pearsauce”, you are eating 7.5 pears.

I would probably stick to 1/4 cup. (Or 1.875 pears.)

What I am more likely to do is save my sweet little jar for fall/winter baking. Baking I can’t eat, but can certainly gift. 🙂

Another idea? Leave out the cinnamon, vanilla and salt, and you have baby food. 🙂 It would freeze well too. Would be awesome mixed with avocado (also in season right now!) for your wee one. 

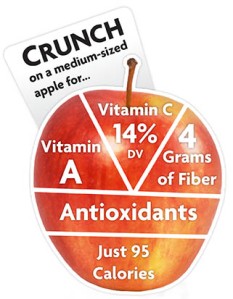
Want some good reasons to eat pears? Check this out:

PearsBuild-Out

and in the interest of equality:

Print

So there you have it. Pearsauce. Easy, nutritious, delicious, and NO added sugar.

Eat well, beauties!

Talk Hair With Me!

Standard

So my A-line is growing out, and not nicely. I hate that about my hair. Once it starts to grow out, it looks a mess. There is no “inbetween” phase that looks good on my head.

I’m not sure I want to do an a-line again though. I think I have hairstyle ADD.

I have an appt. next Friday at noon. I have until then to figure out what I want. I’m considering going SHORT. Help me figure this out!

Do I a-line it again? Pixie? Something in between?

I kinda love this:

short_hairstyles_01_01

I could just go Miley on everyone…

Except I really can twerk.

Links and pics appreciated….

Quick Meals – Round 2!

Standard

When I was a kid, we had “breakfast for dinner night” at least once a week. As a child, I thought my mom was being creative…maybe even a bit daring – breaking all the meal time rules.  As an adult, I know the truth. It was fast, cheap, full of protein, and everyone would eat it.

My kinda meal.

We have breakfast for dinner at least once a week around here. What used to be pancakes and sausage or french toast and eggs is now far more protein packed, and entirely lacking in fluffy goodness, but still delicious.

A recent trip to my favorite Grocery Outlet resulted in a freezer full of these:

applegatesausage


Quality sausages made by a reputable company for $1.49? Yes please! These puppies sell for $5.99 at my Whole Foods so I did not hesitate to buy a huge stack of them. If you have a Grocery Outlet near you, check it out. It’s not at all what it used to be. Great way to provide awesome food to your family on a frugal budget.

Back to the food.

These sausages are pre-cooked, so all you have to do is crisp them up.

While they were frying, I scrambled up a dozen organic, free-range eggs (I’m feeding five here!) in some good quality butter…and yes, some sausage drippings. My CSA has amazing eggs, but I missed out on them this week, so I grabbed a dozen from my mama’s backyard hens. If you don’t have access to free-range eggs, organic is the next best option. Grocery Outlet usually has those, too!

I chopped up some seasonal fruit from my CSA box, served up some iced  mint tea,  and called it dinner.

breakfast for dinner

I always serve eggs with some of my fresh salsa too. It adds loads of flavor, and is a great way to toss in a few extra nutrients for everyone. I am realizing more and more how valuable it is to preserve things from my box each week. A little salsa in the freezer, a little mint, dried and stored in a jar. Little by little, I’m finding ways to not only extend the life of my food, but ways to plan ahead even more than I already do.

If you eat potatoes, they would be so awesome with this meal,  cooked up with onion and jalapenos. Every week, when I place my CSA order, I see potatoes on the list, and it is so hard to resist them every time. I allow myself potatoes once or twice a month, and my next two recipes with feature two of the dishes I use them for (including a potato, bacon and arugula frittata!)

This girl loves a potato.

And breakfast for dinner night.


Quick Meals – Round 1

Standard

One of the biggest challenges for me is finding recipes that are quick, easy, and appropriate for my dietary restrictions.  There are so many nights that I find myself making scrambled eggs and salsa simply because I just didn’t have it in me to make something that called for 18 ingredients.

I thought I would share with you some of the meals I have prepared lately that not only used fresh, organic and gluten and/or grain free ingredients, but also had a prep time of 30 minutes or less. Added bonus: They are remarkably kid friendly too!

Round 1 brings us to a gluten-free pasta dish with hidden nutrition for the wee ones…or for you. 😉

I used three ingredients from my CSA box to make this dish, which always makes me happy. It’s a mission every week to use every item that I receive, so I love when I find new ways to make use of it all.

What you will need to feed 4:

1 large or two small squash, grated

1/4 cup fresh basil, chopped

1 jar of pasta sauce

1 lb organic grassfed beef

olive oil

dried oregano (which if you’re lucky like me, comes in a darling little pull string bag in  your CSA box)

2.5 cups of brown rice penne

pastawithsquash

In a large sauce pot, cook the ground beef until done.

While beef is cooking, use a cheese grater to grate the squash.

Set pasta to boil.

Once beef is cooked, add grated squash.

Cook until squash is tender.

Add pasta sauce (which you already know I have pureed into submission)

Cover and simmer for 10 minutes.

Add basil and a tsp of dried oregano and cook another 4-5 minutes or so.

pastasquashcooking

Add sauce to your now cooked brown rice penne (which you have NOT overcooked because it turns to a disgusting mush if you do!)

Toss with a handful of mozz cheese and a sprinkling of parmesan.

Serve!

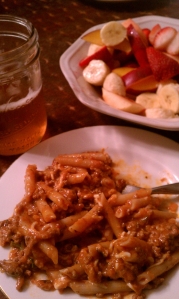
We had this with iced tea and a delicious fruit salad made from season fruit in my CSA box (and a few fair trade bananas.)  I am seriously going to miss summertime fruit.

pastasquashfinished

Delicious, quick, gluten-free, and the kids (and adults) have no clue they are eating squash. This is an easy to one to double and freeze too. 🙂

Enjoy! Round 2…comin’ up!

“Beauty Knows No Pain.”

Standard

When I was a child, I hated to have my hair brushed. I would scream and flail and my mother would simply say to me, “Beauty knows no pain.”

As a little girl, that phrase made little sense to me. Beauty seemed to be something that should be enjoyed, not something to cause pain. It baffled me, but I gave the phrase little thought because my mother was full of one-liners and catch phrases. Even as a child I knew that this was a quote she heard growing up and now used in an effort to calm me down and (let’s be real)  make me sit still so that she could move on to the next never-finished task on her list that I am pretty sure was titled, “The Never-Ending Duties of a Single Mother.”

Her intentions were innocent, and they still are. My mother is simply the best. I giggle now about the idea of my mother trying to wrestle me down and brush my hair. As a mother with daughters, I now know exactly how she feels.

“Beauty knows no pain” had little impact on me as a wee one. It was code for “You better sit your little ass down.” As I grew older, however, I began to distort my mother’s silly message, ultimately tainting the memory and in classic “me” fashion, over-thinking it to death. This is how it developed:

In 4th grade I realized I was chubbier than most other girls.

In 5th grade, I was slapped and punched by a boy who said I was “too fat.”

In 6th grade, I was introduced to racism and fat-shaming.

In 7th grade, I realized that I made more friends on the days I wore my bongo shorts or Guess jeans.

In 8th grade, I became a cheerleader, which came with even more approval and attention.

In 9th grade, at my thinnest, I discovered that I had to eat 700 calories and work out for at least 2 hours a day in order to maintain my figure. Even at this level of starvation and activity, I was still 5’5″, and 135 pounds. Thin, yes, but still pretty solid for a girl practically killing herself. I wore a 5/7 pant but had a 24 inch waist. My thighs still touched. It positively tortured me.

In 10th grade, I quit cheerleading and quit compulsively exercising. I was still restricting food most of the day, but always ate whatever mom made for dinner. It was my comfort…a real meal. Mama can cook, and I really needed the nourishment. This, however, resulted in some weight gain. At the time, I thought I was HUGE. I obsessed over my looks constantly. I was probably a size 9. No where near huge, but in my mind, I was the literal elephant in the room.

In 11th grade, I got a job. A waitress at a crap-hole restaurant. The job sucked, but the money was good for a girl my age. I usually made 50-80 bucks a night in tips, which almost always went to fashion magazines, “fat-free” foods for home, makeup and clothes. Lots and lots of clothes. Clothes for DAYS. It was not uncommon for me to get off work, hit the grocery store for slim-fast or cans of fat-free, meatless chili beans (which I ate out of the can, cold for lunch at school) and then head to whatever dept. store was open so that I could buy an outfit for school the next day. It was a compulsion. I would spend every dollar I had making sure I had something decent to wear the next day, only to panic as soon as I walked on campus. I cannot tell you how many times I turned around, got in my car and drove home. 11th grade was when I figured out the art of the ditch.

My grades began to fall, my closet was over-stuffed, and my head was spinning out of control.

In 12th grade, I was in a full-blown emotional spiral. My life consisted of balancing school, work, shopping, and trying to convince myself I wasn’t hungry. I was missing school quite a bit, and anxiety attacks were a daily issue. The only way I felt completely safe at school was if I was 100% happy with what I was wearing. Or how my makeup looked. Or how happy I was with my latest 60$ hairstyle that surely had to be better than the one I had four weeks ago. I almost didn’t graduate due to lack of attendance. I spent a good portion of my senior year at home, in bed, trying to get myself together. I would get trapped staring in the mirror for HOURS on end, afraid to walk away. I was certain that as soon as I stepped away from the mirror, it was all going to fall apart and my appearance would be a burden on the world.

I cannot even explain how my mind got to this point. I really, really can’t. All I know is that I lived in my own special type of prison.

Trapped. Imprisoned. Terrified. And for what? For some idealistic idea of beauty?

I remember the day it hit me.

“Beauty knows no pain.”

Except that in my mind, beauty was pain. It all seemed like such a deception. I mulled those words over in my head as I walked through the grocery store, looking for “Snackwells” and diet shakes.

I remember thinking, “Beauty is pain because I don’t possess it. If I was beautiful, it wouldn’t hurt.”

The room began to spin as I began to deconstruct and taint a sweet childhood memory. I made it something ugly, and it didn’t take me long.

Time passed.

Marriage.

Babies.

Real Beauty.

Having my first born child was the turning point. It was the first time I realized that my body was capable of something *so* intensely beautiful that it could not be put into words. There is a reason pregnancy isn’t in fashion magazines…the inexplicable gorgeousness of it  would overshadow the latest trends. Lagerfeld’s got NOTHING on creating life.

Long story short? I realized my body was capable of doing something so much more beautiful than donning apparel. It had a purpose. A really, really grand purpose that was far great than what I had used it for.

Also, in this case, beauty did know pain, and it was worth all 45 hours of it.

The next 13 years brought many changes.

3 babies, who did a good job of reminding me of all this cake on occasion. It may have been by saying they “love my squishy hugs” or “Mom, I love to walk behind you because your butt jiggles and it’s funny.”

Or perhaps with drawings such as these, which kept me laughing:

bigjuicymom

lots of stretch marks

a total of 4 years of breastfeeding (and the subsequent physical changes)

weight fluctuations and evidence of aging:

darkhair

skullpic

larger feet:

feet

wrinkles (which I have actually grown to love.)

wrinkles

a few grey hairs…and at least six pairs of yoga pants, which I will spare you a picture of.

For a few years there, fashion went out the window, showers were my beauty routine, and handbags were replaced with diaper bags. Baby slings in various colors became my accessories of choice and I took pleasure in finding a halfway decent nursing shirt.

You know what I learned?

I am beautiful.

Really, really beautiful.

True beauty knows plenty of pain. The pain of vulnerability. The pain of uncertainty. The pain of concern for your babies in a world that is so broken. The pain that only the most genuine beauty in life can bring to a person.

Physical beauty only knows pain if you let it. If you embrace and love yourself, and know that you are beautiful, the pain disappears. You no longer have to compare yourself to a standard set by society. You can, without a doubt, examine your reflection and see that the face looking back at you has a purpose. It has a mission. It has *beauty*.

The only pain I really feel in that department at this point is the hurt that comes when I think of how hard I was on myself, and much happier I could have been. I mourn the days that I lost. The time I wasted hating every inch of myself. Hindsight can be very frustrating.

hindsight

The more I began to see myself in a positive light, the more my mother’s words resonated with me. “Beauty knows no pain” finally made sense. She meant, of course, that brushing my hair, and feeling the resulting pain was worth not looking homeless.(I’m still not convinced. I hate having my hair brushed.)

I’m sure she never expected me to make it into what I did, but the result was that without trying, my mother gave me the grounds for two of the biggest revelations of my life:

1.) Beauty knows no pain when you realize that you are a wondrous creation, artfully made.

2.) Real, genuine beauty in life often comes with a certain pain…but it’s worth it.